How Hard Is the Inca Trail? Difficulty & Training
The distance is only 26 miles. What actually breaks people is the altitude on day two and 1,500 metres of stone stairs on day three. A day-by-day profile, an eight-week training plan built on stair repeats, and an honest list of who should take the train instead.
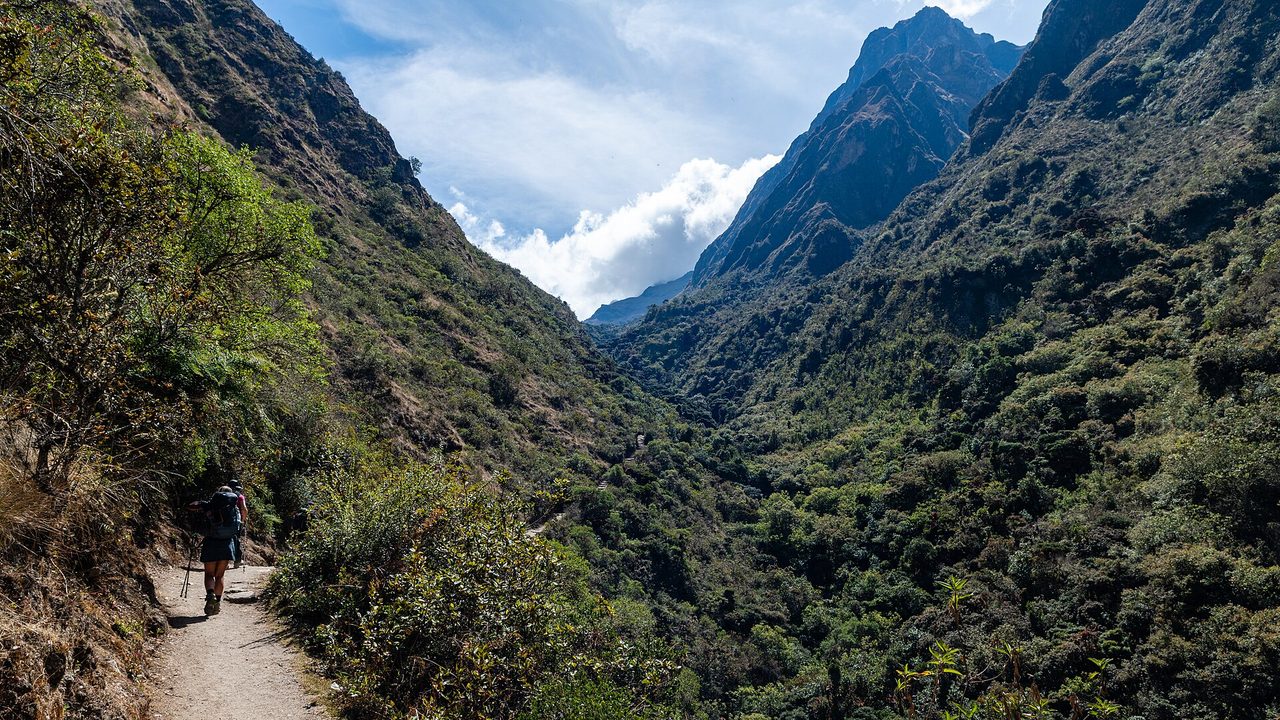
Twenty-six miles. That is the whole thing. Spread over four days, the classic route to Machu Picchu asks you to walk about the distance of a marathon — and yet most write-ups treat Inca trail difficulty as a single vague word, “moderate”, and leave it there. The distance is not the problem. What breaks people is thin air on the way up and thousands of uneven stone steps on the way down, and it is almost always the descents, not the climbs, that end a trip in genuine pain.
I have watched fit marathon runners arrive at the second campsite grey-faced because they flew in from sea level two days earlier, and I have watched a woman in her late sixties who had been walking hills at home for four months stroll past them. That gap is not fitness. It is preparation of a very specific kind, and this guide is about what that preparation actually looks like.
Inca Trail difficulty in one honest paragraph
The classic four-day route is roughly 42 km (26 miles) from the Km 82 checkpoint at Piscacucho to the citadel. Over those four days you climb around 2,500 m in total and you descend around 2,900 m. Read that again: you go down more than you go up, because you start at about 2,650 m and finish at 2,430 m, with a 4,215 m pass in between. Nothing on the route is technical. There is no scrambling, no exposure that requires a head for heights, no rope. What there is, in abundance, is stone — original Inca paving and stairways, worn smooth, uneven, often wet, and frequently steep enough that a single step drops your whole body weight onto one bent knee. Do that ten thousand times in a day and you understand why the trail has a reputation.
If you want the one-line verdict: a reasonably active person who trains sensibly for two months and spends three nights acclimatising in Cusco at 3,400 m will find it hard but entirely manageable. A person who arrives from Lima the day before, has not walked more than a mile in six months, and has knees that already complain on stairs at home will have a miserable four days and may not finish. The variable is not talent. It is time spent preparing.
The day-by-day profile: what you are actually signing up for
Operators publish slightly different figures because campsite allocations vary and the park authority shifts them around, but the shape of the route is consistent. These are the numbers to plan against. Treat the walking hours as what a middle-of-the-pack group actually takes, including the long lunch stop most operators build in.
| Day | Section | Distance | Ascent | Descent | High point | Walking hours | Camp altitude |
|---|---|---|---|---|---|---|---|
| 1 | Km 82 (Piscacucho) → Wayllabamba | ~12 km | ~610 m | ~340 m | ~3,000 m | 5–6 hrs | Wayllabamba, ~3,000 m |
| 2 | Wayllabamba → Dead Woman’s Pass → Pacaymayo | ~8 km | ~1,270 m | ~630 m | 4,215 m | 7–9 hrs | Pacaymayo, ~3,600 m |
| 3 | Pacaymayo → Runkurakay → Phuyupatamarca → Wiñay Wayna | ~13 km | ~630 m | ~1,520 m | 3,950 m | 8–9 hrs | Wiñay Wayna, ~2,680 m |
| 4 | Wiñay Wayna → Inti Punku → Machu Picchu | ~6–7 km | ~185 m | ~450 m | ~2,730 m | 2–3 hrs | — (Aguas Calientes or Cusco) |
Two things jump out of that table. Day 2 has the least distance and the most climbing — eight kilometres, 1,270 metres up. It is a stair-machine session at 4,000 m. And Day 3, which every operator brochure describes as “the most beautiful day”, is the longest day on the trail and drops you a vertical kilometre and a half. Day 3 is where the injuries happen.
Day 4 barely counts as hiking. You are woken somewhere around 3.30am to queue at the Wiñay Wayna control gate, which opens at 5.30am, then walk an hour or so in the dark to the Sun Gate. The only sting is a short flight of near-vertical steps just before Inti Punku that people climb on all fours. After that it is downhill into the ruins, and a guided circuit before you head down to Aguas Calientes for the train.
The three passes, named and ranked
The route crosses three named passes. Only one of them is genuinely feared, and it deserves its reputation.
Warmiwañusca — Dead Woman’s Pass, ~4,215 m
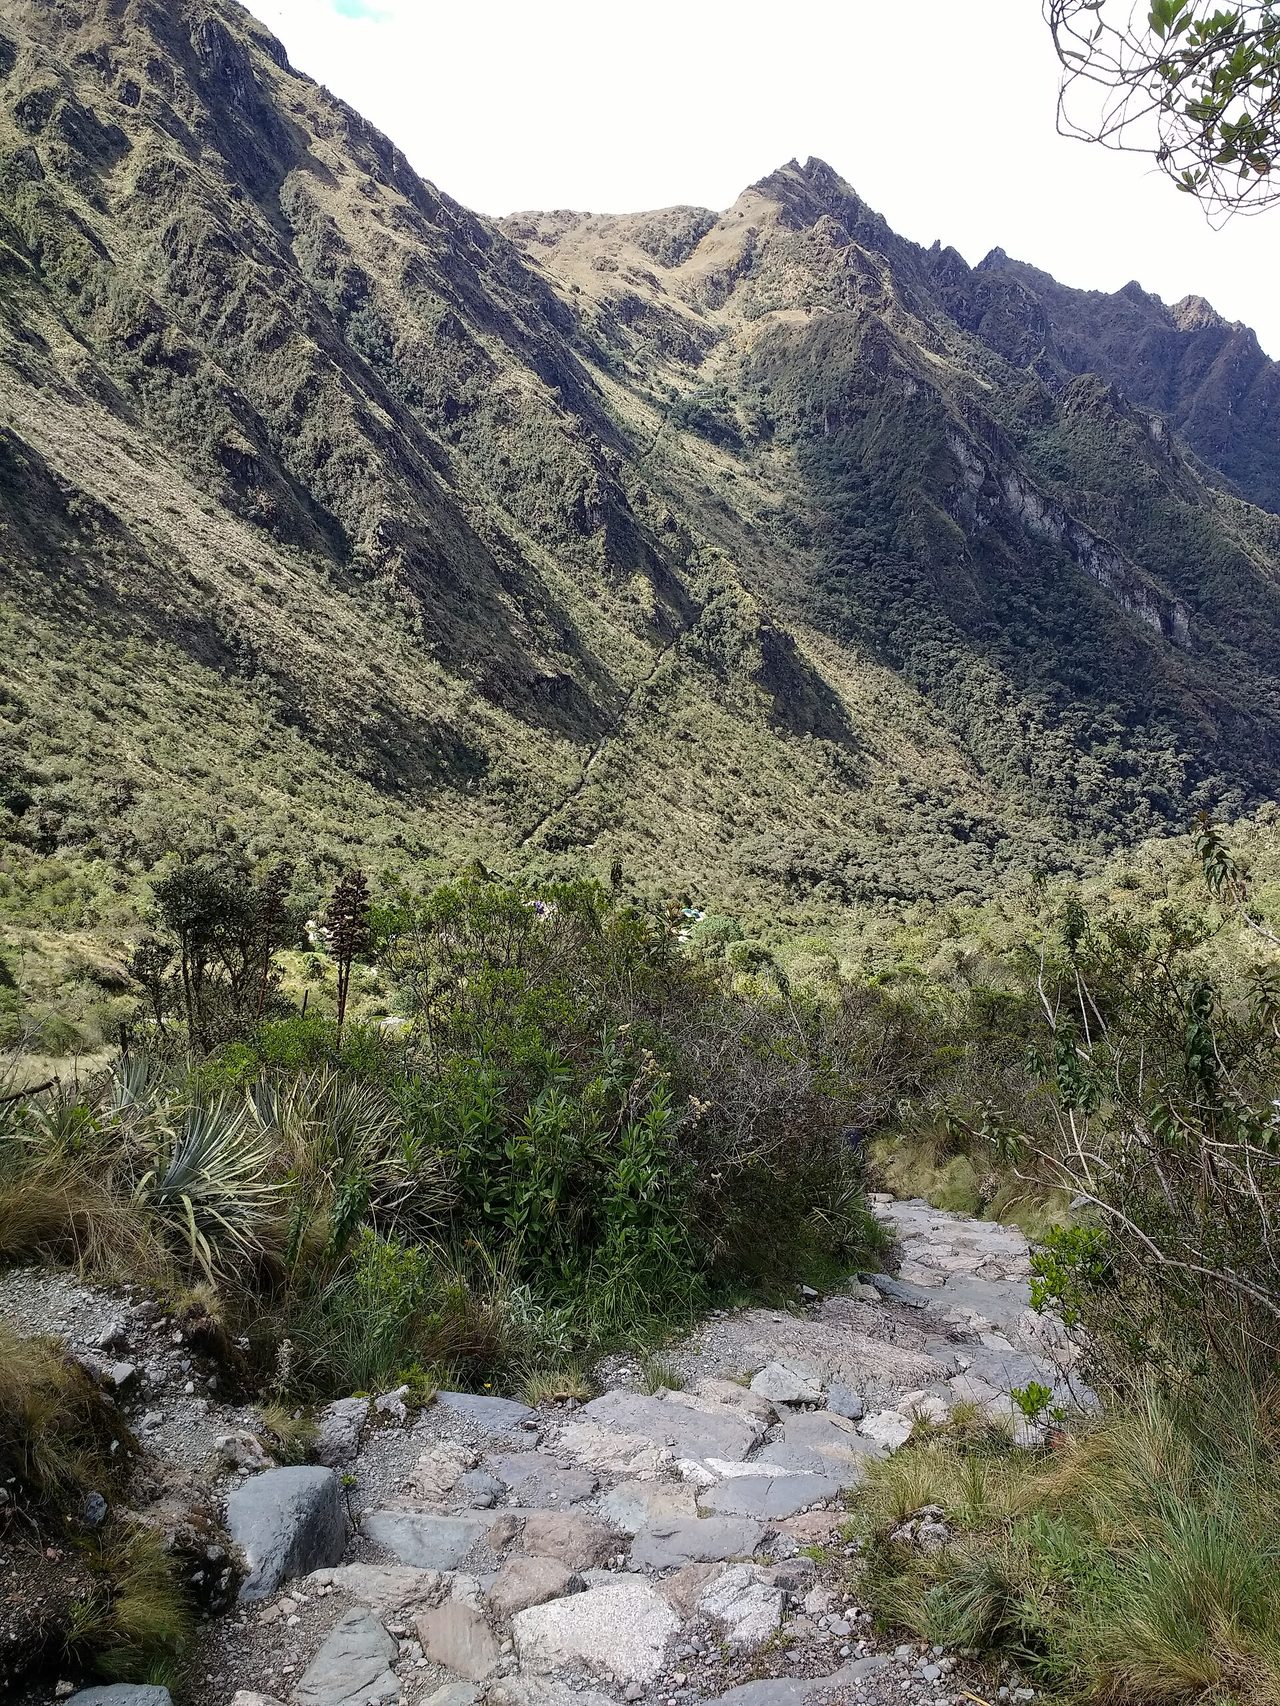
The high point of the trail, crossed mid-morning on Day 2. The name comes from the profile of the ridge, which looks like a reclining woman from below, not from anything grislier. The climb from Wayllabamba is about 1,200 vertical metres, and the last 400 of it is open stone staircase with nothing to hide behind and no shade. At 4,215 m you are breathing air with roughly 60 per cent of the oxygen you get at sea level. Everyone slows down. People who normally hike at 5 km/h find themselves doing 1.5. Groups routinely spread out over ninety minutes on this section, and a good guide splits so the slowest walker is never alone.
Be very careful with numbers you read elsewhere. Several page-one guides state that Day 2 crosses a pass “at 4,500 metres”. There is no 4,500 m pass on the Inca Trail. Warmiwañusca at about 4,215 m is the highest ground you will stand on. Another widely-read guide describes Cusco as sitting at “3,399 feet above sea level” — that is metres, and the difference matters enormously when you are deciding how long to acclimatise.
Runkurakay, ~3,950 m
Day 3’s opening act. A 45-minute to 90-minute climb from Pacaymayo past the circular ruin that gives the pass its name. Shorter and lower than Dead Woman’s Pass, and by this point you have slept two nights above 3,000 m, so most people find it noticeably easier than the numbers suggest. This is the section where people start to enjoy themselves.
Phuyupatamarca, ~3,650 m
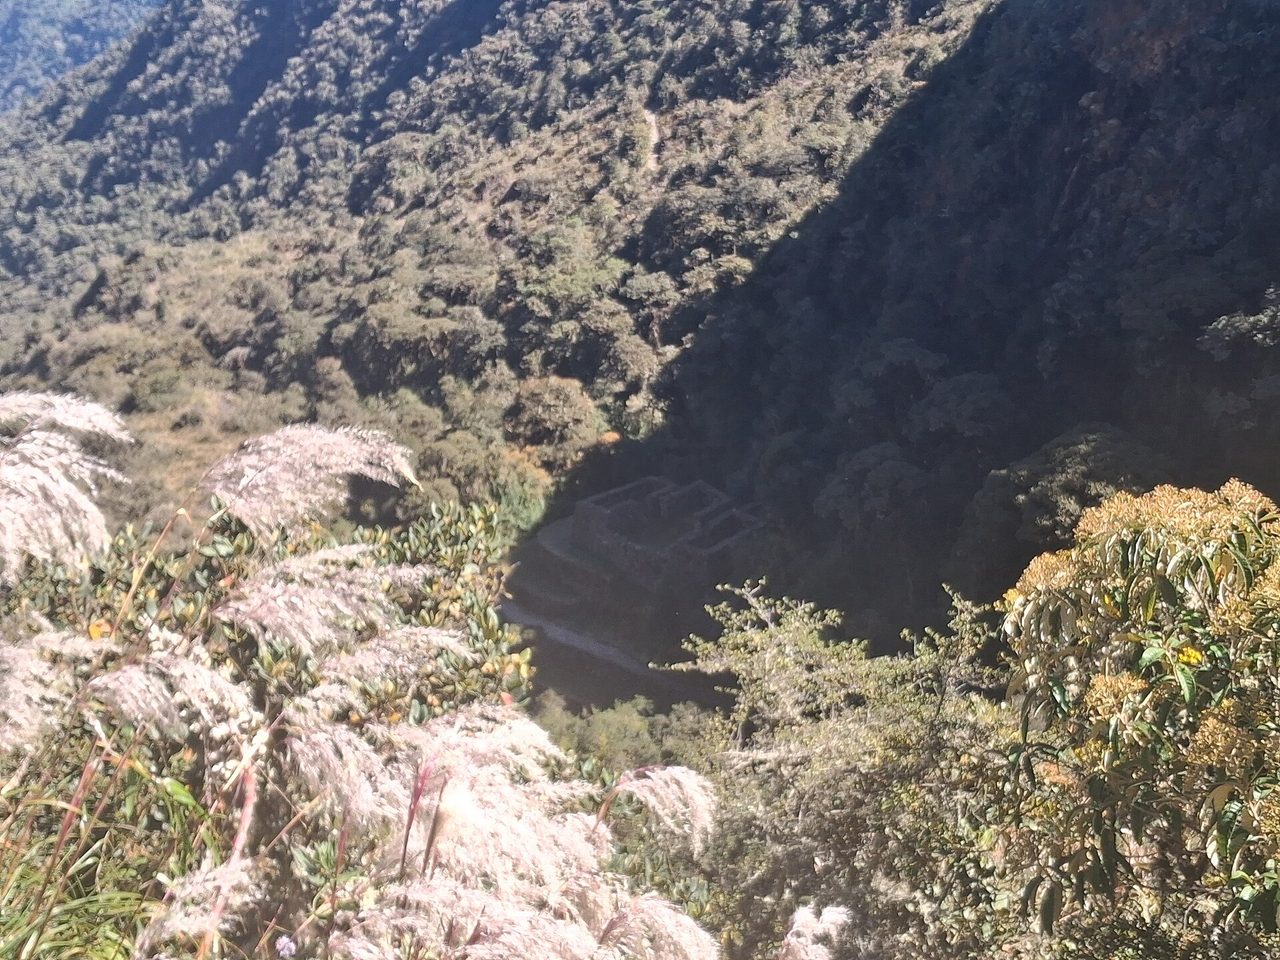
The “town above the clouds”, and the last high ground. From here the trail begins the long, relentless stone descent to Wiñay Wayna. Depending on the operator this is either a set of well-cut steps or, in places, a staircase carved directly into bedrock with treads at awkward heights. It goes on for hours. The scenery through the cloud forest is the best on the route and almost nobody remembers it fondly, because their quadriceps are on fire.
Why knees fail before lungs
This is the part almost every guide skips, and it is the single most useful thing I can tell you.
Walking uphill is concentric work: your muscles shorten as they contract, and when they run out of capacity you simply stop, breathe, and start again. It is unpleasant but self-limiting. Walking downhill is eccentric work: your quadriceps lengthen under load to control the fall, absorbing your body weight plus your pack on each step. Eccentric loading causes far more muscle damage than concentric loading, and it accumulates. It also transmits force straight through the knee joint.
Now add the specific geometry of the Inca Trail. These are not modern switchbacks graded for comfort. They are Inca stairways, built for people carrying loads at a steady pace, with irregular riser heights — some 15 cm, some 40 cm — and treads that are often narrower than a boot. You cannot fall into a rhythm. Every step is a small individual decision, and a decent proportion of them require a deep controlled lower onto one leg. Day 3 asks for roughly 1,500 vertical metres of that.
Wet stone doubles the problem. In the shoulder months, and on any morning after overnight cloud, the steps in the cloud-forest section stay greasy until mid-morning. Groups slow to a crawl, and the slower you go on stairs, the longer each muscle contraction lasts. Ask anyone who walked it during the wetter months from November to March and they will tell you the descent, not the pass, is what they remember.
Practical consequences: use two trekking poles with rubber tips, which are compulsory on the trail to protect the stonework and are cheaper to rent in Cusco than to fly out with, and set them long for descents. Poles reduce the load through your knees meaningfully on stairs. Take short steps rather than long ones. And do not race the descent because you feel good — the damage is done at the time, and you pay for it the following morning.
Acclimatisation is the single biggest determinant
If you only act on one thing in this article, make it this. The most common reason people fail on the Inca Trail is not that they are unfit. It is that they arrived in the Andes too recently.
Cusco sits at about 3,400 m. Lima is at sea level. Flying between them takes about ninety minutes, which means you can go from sea level to 3,400 m faster than your body has any evolutionary business doing. The classic mistake is landing in Cusco on a Sunday, doing a city tour on Monday, and starting the trail on Tuesday. That gives you roughly 36 hours of adaptation before you walk to 4,215 m.
Book a minimum of two full nights in Cusco before the trek, and three if you can afford the days. Better still, sleep two of those nights lower — the Sacred Valley towns like Ollantaytambo and Urubamba sit around 2,800–2,900 m, several hundred metres below Cusco, which many people find far easier for a first night. Then go up to Cusco. Our guide to how many days to spend in Cusco works through how to fit that around the rest of a trip without wasting a week.
What acclimatising actually looks like in practice, over three days:
- Day 1: Arrive, walk slowly, eat lightly, drink far more water than feels necessary, and do not drink alcohol. A headache in the first 24 hours is normal. Vomiting and breathlessness at rest are not.
- Day 2: A gentle walk. Sacsayhuamán above the city is perfect — it is a 45-minute uphill walk from the Plaza de Armas, gets you to 3,700 m, and gets you back down to sleep low. The fortress above Cusco doubles as a proper sightseeing morning.
- Day 3: Something with real vertical, then rest. A day trip out of Cusco that involves walking — Pisac’s terraces, the Maras salt pans — is ideal.
What not to do the day before you start: Rainbow Mountain at 5,036 m. It is a legitimate acclimatisation aid four or five days out, but people book it for the day before the trail, get thoroughly wrecked by a 3am start and a lung-busting final climb, and then start a four-day trek already in deficit. Humantay Lake is a gentler version of the same idea and a better choice.
Coca tea and coca leaves are ubiquitous and mildly helpful. Acetazolamide (Diamox) genuinely works as a prophylactic and is available over the counter in Peruvian pharmacies, but talk to a doctor at home first, particularly if you have a sulfa allergy. Neither substitutes for time.
A realistic 8–12 week training plan
Most training advice for this trek is generic cardio: “do some running, use the cross trainer”. That prepares you for the part of the trail that is not the problem. Your heart and lungs will be fine within two days of arriving in Cusco. Your quadriceps, calves, ankles and knees will not adapt to twelve thousand stone steps unless you make them.
Build the plan around three things: stair repeats, loaded downhill work, and one long walk a week. Four sessions a week is the target. Three is enough if you are already active. Start twelve weeks out if you are coming from a sedentary base, eight if you already hike.
| Weeks | Stair or hill repeats (2×/wk) | Long walk (1×/wk) | Strength / eccentric (1×/wk) |
|---|---|---|---|
| 1–2 | 15–20 min continuous stairs, no pack | 90 min on flat ground | Bodyweight step-downs 3×10 per leg, calf raises, glute bridges |
| 3–4 | 25–30 min, 4–5 kg daypack | 2–2.5 hrs, some hills | Add split squats and a slow 4-second lowering phase |
| 5–6 | 35–40 min, 6–7 kg pack, walk down as well as up | 3–4 hrs on uneven terrain | Step-downs 3×12 per leg holding 8–10 kg; single-leg balance work |
| 7–8 | 45 min, full daypack weight, deliberately slow descents | 4–5 hrs, back-to-back on consecutive days once | Loaded step-downs, heel drops for the calves and Achilles |
| 9–10 | 45–50 min, add a second flight-descent block | 5–6 hrs with the boots and pack you will actually use | Maintain load, add ankle stability drills |
| 11 | 30 min, easy | 2–3 hrs, easy | Light, technique only |
| 12 | Rest. Two or three easy walks, nothing hard in the final 7–10 days | — | — |
A few specifics that matter more than the schedule:
- Walk down the stairs, don’t take the lift. This is the whole point. If you do stair repeats in a building and ride the lift back down each time, you have trained half the trek. Descend under control every single repeat.
- Step-downs are the single best exercise for this trail. Stand on a step, lower yourself slowly on one leg until the other heel kisses the floor, come back up. Four seconds down. This is exactly what Day 3 asks for, repeated for hours.
- Train in your boots. Not in trainers. Blisters end more Inca Trail days than altitude does, and a boot that is fine for two hours is not necessarily fine for eight. Break in new boots over at least 50–60 km before you fly.
- Carry the actual pack. Your daypack on the trail will hold three litres of water, layers, a rain shell, snacks and a camera — call it 6–8 kg. Train with that weight, not with an empty bag.
- Do one back-to-back weekend. Four hours on Saturday and four on Sunday teaches you something a single long walk never does: how your legs feel starting a hard day already tired. That is Day 3.
- Taper properly. Nothing hard in the last week to ten days. Arriving with sore legs is a self-inflicted wound.
Altitude cannot be trained at sea level in any meaningful way. Hypoxic masks do not work. Sleeping in an altitude tent does, marginally, if you have three or four weeks and several thousand pounds. For everyone else, the answer is the three nights in Cusco.
Who should not do the Inca Trail
Every tour operator has a commercial incentive to tell you that you can do it. Here is the honest version. These are not absolute bans, but each one is a reason to have a specific conversation with a doctor who knows your history, well before you pay a non-refundable permit deposit.
- Recent knee or hip surgery, or a joint replacement inside about a year. The descent loading is severe and there is no way to opt out of it once you are past the first checkpoint. If you have had a meniscus repair, an ACL reconstruction or a replacement, ask your surgeon specifically about 1,500 m of stair descent, not about “hiking” in the abstract.
- Uncontrolled cardiac conditions — unstable angina, poorly controlled arrhythmia, recent MI, uncontrolled hypertension. Altitude increases heart rate and blood pressure and you will be four days from a road.
- Significant respiratory disease — severe or brittle asthma, COPD, pulmonary hypertension. Reduced partial pressure of oxygen at 4,215 m is not something willpower fixes.
- A history of high-altitude pulmonary or cerebral oedema. Recurrence risk is real and both are life-threatening in a place with no vehicle access.
- Pregnancy. Most operators decline bookings, and sensibly so.
- Sickle cell disease and some other haemoglobinopathies — altitude can trigger crises.
- Very young children. Operators commonly set a minimum around 12, and 8 or 10 is sometimes accepted on family departures. I would think hard below 12, and not because of the walking — because a tired eight-year-old cannot be put on a horse. Other routes to the citadel allow pack animals; this one does not. A child who has had enough on Day 3 still has to walk.
- Anyone with a serious fear of camping in the cold. Nights at Pacaymayo drop close to freezing in the dry season. That is not a medical issue but it ruins more treks than people admit.
If two or more of these apply to you, the honest alternative is not a lesser version of the same trek — it is a different way to reach the citadel entirely. There is no shame in it, and I will come back to that below.
Age: the sixties-and-beyond question
People in their sixties and seventies finish this trail every week of the season, and some of them do it faster than the twenty-somethings in the group. The correlation with age is far weaker than the correlation with two things: how well you acclimatised, and whether your knees are sound.
What genuinely changes with age is recovery between days rather than capacity on any single day. If you are over 60, I would tilt three decisions: take the five-day version of the classic route rather than the four-day, which covers the same ground with an extra night and turns the brutal Day 3 into two manageable halves; hire the extra personal porter without agonising over it; and add a fourth acclimatisation night. None of those is an admission of weakness. They are the same adjustments a sensible 30-year-old with a desk job should be making.
The extra personal porter — the legitimate cheat code
Every authorised operator includes porters. They carry the tents, the kitchen, the food and a set allowance of your personal kit — usually somewhere between 5 and 7 kg, which typically covers a sleeping bag, sleeping mat and a change of clothes. That is the standard duffel.
What you can add is an extra personal porter, or a larger personal allowance. Prices move, but at the time of writing most Cusco operators charge somewhere in the region of US$140–190 for the four days, either as a flat rate for a dedicated porter or tiered by additional kilos. It sits on top of the trek price itself, which splits into a fixed government slice and an operator margin. Some sell it in blocks of extra kilos, which is cheaper if you only need a little more.
This is not cheating and it is not a luxury purchase. It is the difference between carrying 8 kg up Dead Woman’s Pass and carrying 3 kg. If you are on the fence about your fitness, are over 55, have any knee history, or simply want to enjoy the trek instead of surviving it, this is the best money you will spend on the whole trip — better value, in my view, than upgrading your train home or your hotel.
Porters are protected by Peruvian law — Law 31614, in force since November 2022 — which caps loads at 20 kg for men and 15 kg for women, sets a minimum age of 18, and requires the operator to provide insurance, proper clothing and adequate sleeping conditions. Loads are weighed at checkpoints. Compliance varies, and the cheapest operators are cheap for a reason. Ask directly, before booking, how much porters carry, what they sleep in, and whether they are insured. A good agency answers in writing without hesitating. Budget separately for tips as well: the usual reference is somewhere around S/45–100 per traveller into a group pot for the porters, and US$15–20 per traveller for the guide, handed over on the last night. There are no cash machines on the trail, so bring soles from Cusco.
Evacuation: what actually happens if you cannot go on
This is the detail that reframes the whole risk calculation, and hardly anyone mentions it.
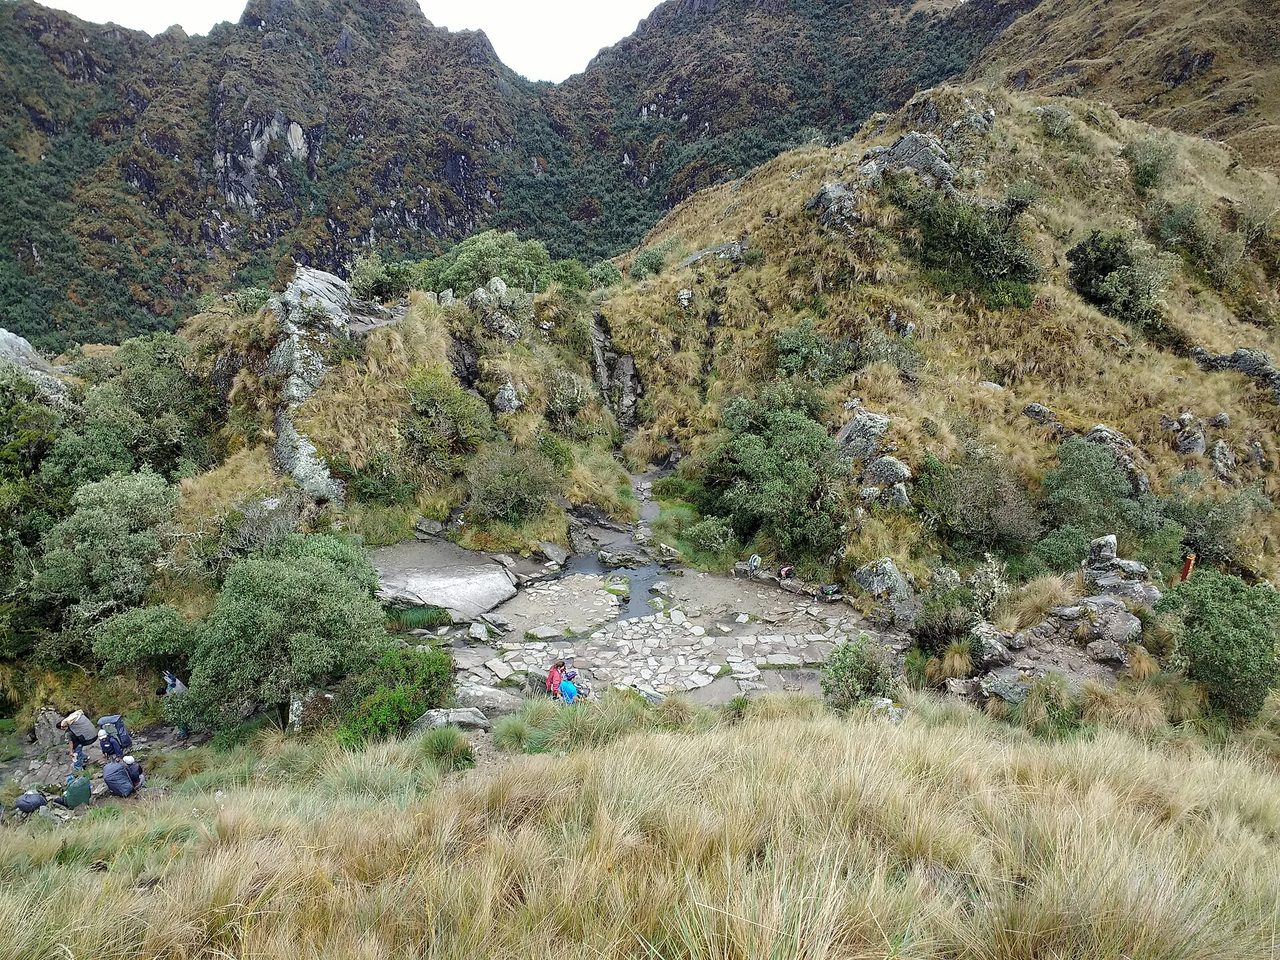
There is no vehicle access between Km 82 and Machu Picchu. None. The trail is a protected archaeological route and pack animals are banned on it precisely because hooves would wreck five-hundred-year-old stonework. So the machinery that rescues you on most trekking routes — a jeep to the trailhead, a horse to the road — does not exist here.
In practice, evacuation means one of three things. On Day 1, while you are still in the Cusichaca valley below Wayllabamba, you can be walked or ridden back down to the road at Km 82 relatively easily. From Wayllabamba to Phuyupatamarca — the whole high middle of the trek — a person who cannot walk is carried, on a stretcher, by porters and guides, over the same steps that hurt to descend on two working legs. It is slow, it takes a large number of people, and it is genuinely grim for everyone. Past Wiñay Wayna you are close enough to the railway line at the bottom of the valley for that to become the exit. Helicopter evacuation from the trail is not a routine service and weather in a cloud-forest valley frequently rules it out.
Two things follow. First, buy travel insurance that explicitly covers trekking to 4,500 m, and check that the wording covers evacuation and repatriation rather than just medical treatment. Second, be honest with your guide early. Guides can radio ahead, split the group, redistribute your daypack and slow the pace — all of which is easy on Day 1 and nearly impossible at 4,000 m on Day 2. The people who get into trouble are almost always the ones who said they were fine for six hours longer than they were.
How it compares: Salkantay, the short trail, and the train
The most useful thing a difficulty guide can do is tell you when the answer is a different route. Here is the honest comparison.
| Route | Days | Distance | High point | Permit required | Genuinely better for |
|---|---|---|---|---|---|
| Classic Inca Trail | 4 (or 5) | ~42 km | 4,215 m | Yes, sells out months ahead | People who want the archaeology, the Sun Gate arrival, and the historical continuity — and who have trained for stairs |
| Salkantay Trek | 4–5 | ~70–75 km | 4,630 m | No permit needed | Strong hikers who left booking too late, want bigger mountain scenery, and can handle a higher pass. Harder aerobically, gentler underfoot |
| Short Inca Trail (Km 104) | 2 | ~10–12 km | ~2,730 m | Yes, but easier to get | Anyone with knee doubts, limited time, or a dislike of camping. You still arrive through the Sun Gate and you sleep in a hotel |
| Lares Trek | 3–4 | ~35 km | ~4,400 m | No | Travellers who care more about Andean village life than ruins, and who want the option of a horse when tired |
| Choquequirao | 4–9 | ~60 km+ | ~3,100 m | No | Experienced trekkers only. The 1,500 m canyon descent and re-ascent is harder than anything on the Inca Trail |
| The train | 1–2 | — | 2,430 m | No | Anyone whose body says no, anyone travelling with small children, anyone short on time. Machu Picchu is the same Machu Picchu |
Two comparisons deserve unpacking. Against Salkantay: the Salkantay pass at about 4,630 m is over 400 m higher than Dead Woman’s Pass, and the route is nearly twice as long, so on paper it is harder. In practice most people find Salkantay easier on the body because much of it is on dirt track rather than stone stairs, and mules carry the gear. If your weakness is your knees, Salkantay is the safer choice; if your weakness is your lungs, the Inca Trail is. Our head-to-head on the two routes goes through the trade-offs in detail, and the wider roundup of Peruvian treks covers the alternatives beyond Cusco.
Against the train: there is a strain of trekking snobbery that treats arriving by rail as second-rate. Ignore it. The citadel does not know how you got there, and a huge proportion of the people whose photographs you have admired arrived on the Vistadome. If the honest assessment of your knees, your heart or your available days says no to four days of stairs, take the train and spend the saved energy on the ruins themselves. Our guide to the ways of getting to Machu Picchu lays out every option and what each costs.
Season changes the difficulty more than people expect
The trail closes for the whole of February for maintenance, so that month is out entirely. Beyond that, the choice is between dry and wet, and it changes the trek materially.
May to September is the dry season: firm footing, clear passes, and nights at the high campsites that can drop to around freezing. June to August is the busiest and the coldest. The trade-off is straightforward — you get grip and views, you pay in crowds and cold nights.
November to March brings rain, mud, and slippery stone. It is not dangerous with poles and decent boots, but the descents take substantially longer and the cloud often sits on the passes. Permits are far easier to get and the landscape is green rather than straw-coloured. April and October are the sweet spots for many people: reasonable weather, thinner crowds, better permit availability. Our breakdown of when to visit Machu Picchu and the piece on travelling in the shoulder months go deeper on the month-by-month picture.
Kit that genuinely changes the difficulty
Most packing lists are indiscriminate. These four items actually move the needle:
- Two trekking poles with rubber tips. Not one. Rubber tips are mandatory on the trail. Poles take a substantial share of the impact off your knees on descents and are worth more than any other single piece of equipment.
- Broken-in boots with ankle support and a stiff-ish sole. Soft trail runners are fine on dirt and punishing on stone steps, where a flexible sole lets your foot deform over every edge.
- A proper rain shell and pack cover. Being wet at 4,000 m turns an uncomfortable day into a dangerous one, and afternoon rain happens in every month.
- A head torch. Day 4 starts in the dark and the campsites have no lighting. Phone torches are not adequate.
For everything else, including the layering system that copes with 20°C sun and near-freezing nights in the same 24 hours, our guide on what to wear at Machu Picchu covers it. And if you are still working out where the trek sits in a wider trip, the full Inca Trail overview and the practicalities of securing a permit are the next two things to read — 2026 permits opened on 17 November 2025 and were largely gone for the dry-season months within days.
Common questions about Inca Trail difficulty
Is the Inca Trail hard?
Yes, but in a specific way. It is not technically difficult and it is not long. It is hard because of altitude on Day 2 and because of sustained stone-step descent on Day 3. A person who trains for stairs for two months and spends three nights at 3,400 m beforehand will find it demanding but comfortably within reach. A person who does neither will struggle badly.
What is the hardest day?
Day 2 is the hardest while you are doing it — 1,270 m of climbing to a 4,215 m pass. Day 3 is the one that causes injuries: the longest distance, and about 1,520 m of descent on uneven stone. Ask people six months later which day hurt and they say Day 3.
How fit do I need to be?
Enough to walk six to eight hours on consecutive days, and enough to climb 45 minutes of stairs with a small pack without stopping to recover. That is a real but achievable bar for most people with eight to twelve weeks of preparation. You do not need to run, and you do not need a gym.
Is the Inca Trail harder than Kilimanjaro or Everest Base Camp?
No, on both counts, and it is not close. Kilimanjaro tops out near 5,895 m and Everest Base Camp involves a fortnight at altitude. The Inca Trail is a four-day trek with one 4,215 m pass. That said, people who have done all three often say the Inca Trail is the hardest on the knees, purely because of the stairs.
Can I do it in my sixties or seventies?
Plenty do, every season. Conditioning and acclimatisation matter far more than the number. If you are over 60, take the five-day version, hire the extra porter, and add an acclimatisation night.
What happens if I cannot finish?
Tell your guide as early as possible. On Day 1 you can turn back to the road relatively easily. In the middle section there is no vehicle access, pack animals are banned, and a non-walking casualty is carried out on a stretcher. Insurance with trekking cover to 4,500 m is not optional.
Do I need trekking poles?
You do not strictly need them, and you will wish you had them. Rubber tips are compulsory to protect the stonework. Rent or buy in Cusco if you do not want to fly with them — there are outfitters all over the streets around the Plaza de Armas.
How many hours a day will I actually walk?
Roughly 5–6 on Day 1, 7–9 on Day 2, 8–9 on Day 3 and 2–3 on Day 4, including breaks and a sit-down lunch. Slower groups add one to two hours to Days 2 and 3.
Should I hire a personal porter?
If you have any doubt at all, yes. Around US$140–190 for the four days is a small share of the trip cost and it is the single most effective way to reduce how hard the trek feels. Check what your operator’s standard duffel allowance already covers before you pay for more.
Is the Inca Trail dangerous?
Not in the mountaineering sense. The realistic risks are altitude sickness, a fall on wet stone, and blisters that go untreated. All three are largely preventable, and all three get worse if you hide them from your guide.
Does the trek cost more than the train?
Considerably. A four-day group departure with a reputable operator typically runs from about US$700 to US$900 including permits, porters, meals and the return train, before tips and gear. Note that Inca Trail entry is not subject to the SERNANP conservation surcharge added on 1 May 2026, which pushed the standard foreign adult citadel ticket to S/163 (S/211 for the circuits that include Huayna Picchu or Machu Picchu Mountain) — that applies to visitors arriving independently. Prices move, so check the official portal and see our breakdown of what a Peru trip costs before you budget.
Is it worth it, given how hard it is?
For the right person, unreservedly. Walking into the citadel through Inti Punku at dawn, on the road the Incas built to arrive that way, is a different experience from stepping off a bus. But it is a genuine four-day physical undertaking with no exits, and the honest answer for a meaningful minority of people is that the site itself is the point and the walk is optional. Decide which you are before you pay the deposit, not on Day 2 at 4,000 m.